Showing posts with label photo booth. Show all posts

7.09.2012

Fourth of July...2012


July 4, 1776... The day our beautiful country declared it's Independence!
And here we are, 236 years later...still Independent. Although it hasn't been the easiest... 
We've fought battles, witnessed disasters, and experienced tragedies.
But we still stand as One United Country.
A country that I am so proud to call HOME!
I am PROUD TO BE AN AMERICAN!!

Every year, My AMAZING friends Karen & Stephen, put on a fabulous BBQ. They invite all their friends and family to celebrate the Fourth of July and also to show their Gratitude to our awesome Veterans & Active Service Men & Women. (Their son is currently serving in the Marines).
 There are fun games, GIANT water slides and kiddie pools, an abundance of ICE cold refreshments and the yummiest food (all homemade might I add). And ending the day by taking drive down the road, all the Polaris' decked out in their Red White & Blue parked on top of a vacant lot, watching the lights explode in the Sky! Oohs and Aahs!!
 And  remembering why we are all here... To remember those who have lost their lives, those who have fought for our Freedom, and all that continue fight so that we can sit on top of this hill and feel so safe and loved surrounded by family and friends.

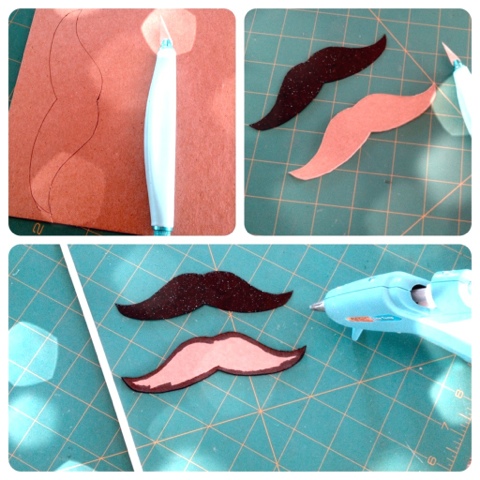
This year to add to the fun festivities of the day, I offered up doing a Vintage Red White & Blue Themed Photo Booth. It took many {DIY} projects and a few thrifty purchases, but I think that it came together better than I could have imagined!!
I took some burlap, some white lace that I dyed with Tea and stapled them to 2in x 1in x 6ft piece of wood and hung it up on to a shed. Hung up my Fabric Fourth of July Banner. Made some of those fun Tissue Balls (definitely need to perfect making those). And set up a fun vintage chair that I found on Craigslist. I was pretty proud of myself for pulling this together!
Now it was time to get this show started!! Everyone seemed to enjoy it, and even got a little silly and dressed up with the photo props that I made and bought (I purchased a bunch of Fourth of July items from Michael's when they had everything at 50% off!)
I definitely want to do this again and try out different themes and find more funky photo props to add to the silliness!!
Here are a few of my favorite pictures that were taken, hope you enjoy!!

This little guy was my BIGGEST FAN!! You will see why as you continue...


I actually took a picture!! This is one of my AWESOME Friends Jen!!


This was one of my favorite pictures of the day...

If you would like to see more of these fun pictures, check out my photography page on
 Facebook, Heidi Toevs Photography.
I will also try to get these up on my photography blog soon too,
Heidi Toevs Photography.

Thanks!!


7.07.2012

{DIY} Fourth of July Fabric Banner

So this post is a little late, seeing as today is the 7th. But better late than never, right!?

I have been wanting to make one of these banners that I have been seeing every where. They are so cute and add something special to what ever event they are being hung at.
So what better time to make one, to help celebrate the Fourth of July. I was doing a photobooth for a friends party and it was perfect to hang on the backdrop.
What makes this even better, it's SUPER easy!

I cut out triangles that were about 7 1/2 in on top and 8 in down both sides (You can do as many as you want, I made sure I had enough to do a front and back for one triangle piece) and then I whipped up this funky shape to use in between each triangle...you can do pretty much what ever shape or nothing in between... And you are also going to need some Double fold bias tape in a coordinating color. I grabbed 3 just to be safe, I used one 3 yard piece for each section I made.
To keep with in the Fourth of July theme, I painted of course, Red White & Blue! I use your basic fabric paint and let dry.
Now pin the front (painted triangle) to the back (plain triangle) and then I folded my little funky piece in half and pinned everything in place. Then sewed up the sides! On the triangles I didn't worry about sewing the top because it is going to get sewn shut once added to the bias tape.
Now insert your pieces into the bias tape, leaving enough room at each end of the tape to use to tie up. I sewed all the way threw the tape closing up the end pieces as well.
Now that it's all sewn together, hang and ENJOY and of course CELEBRATE!!!

I really love how it turned out!! Definitely plan on making more in the future and will be pulling this back out next year!

***Stay tuned for my post on how I put together my Photo Booth that I used the Banner for, plus some fun photos that were taken!!***


6.21.2012

{DIY} GLITTER Photo Booth Props

So here is my first {DIY PROJECT}...Bare with me and my instructions!
 I have been wanting to make some of these bad boys for awhile, but they always seem to get put on the back burner. But, because I have a photo booth shoot coming up in a few weeks, I thought I better get to it and get these done! Super easy to do, and I have to say, I was very happy with the results!!


Supplies:
Glitter Card stock Paper (I got mine at Michael's)
Chipboard (ordered mine on Amazon, because our
Michael's doesn't carry it)
Some dowels 
Exacto Knife & Scissors
Hot Glue Gun/Glue Sticks
 Image Templates (http://www.accenttheparty.com)
Trace your cut out template on to the back of the glitter card stock and cut out. I then took a Sharpie and colored the white edges so it wouldn't stand out in pictures (or look tacky for that matter)
I then did the same thing with the chipboard. And this is where the exacto knife comes in handy to get a smooth edge. 
*After I had made my first one, I decided to make my chipboard pieces smaller that the card stock so there was no chance of it sticking out (see image below)


Then hot glue the chipboard and card stock pieces together. And finish by attaching your dowel to the chipboard. You could either paint or add so fun ribbon around the dowel...but I was just happy with the natural, and that I had finished them.

They turned out pretty cute! I think I might add a few more fun ones in there, a beard and may be an eye patch for giggles!! 
Hope this was easy to follow and that you have fun making your own!
I look forward to posting many more projects in the future!
Blogging tips